WordPress Accessibility Widget Installation Guide
Get AxOrigin up and running on your website in minutes.
Follow these steps to integrate the AxOrigin accessibility widget with WordPress
Official App Available (Recommended Integration Method)
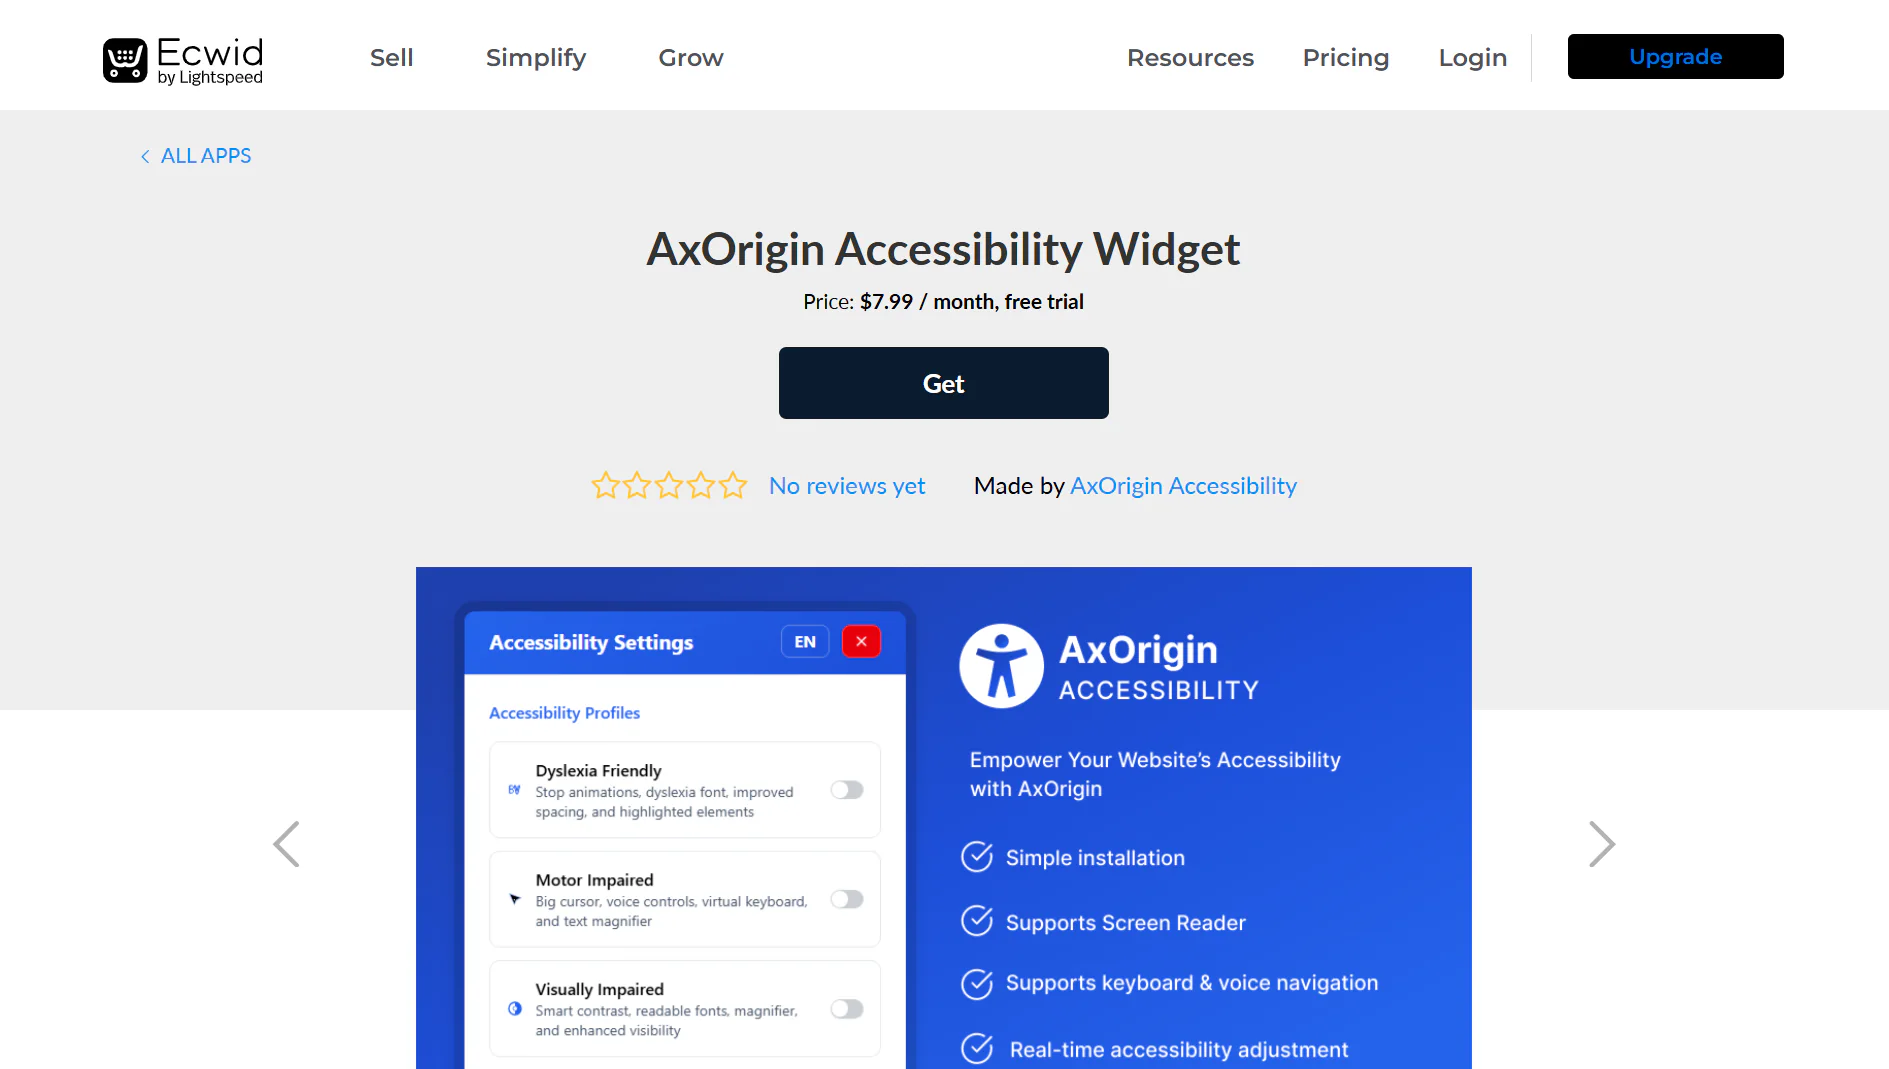
Install directly from the WordPress marketplace
- 1
Login to your Ecwid account.
- 2
Install offical AxOrigin Ecwid App.
Manual Installation (Alternate Integration Method)
- 1
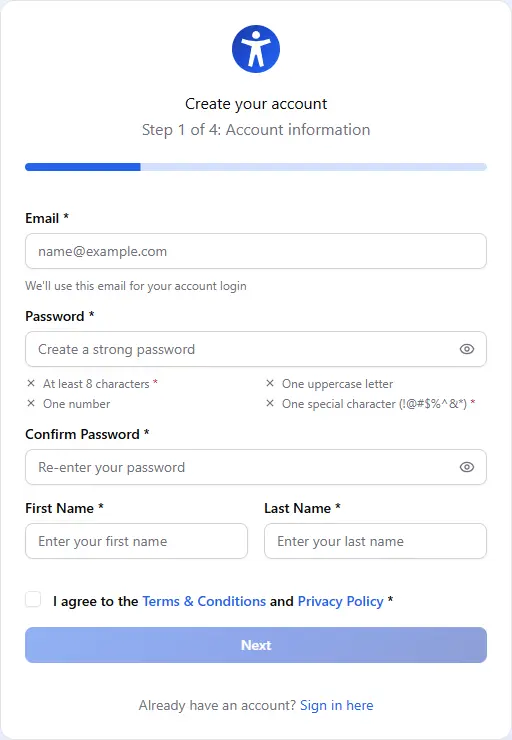
Navigate to AxOrigin Dashboard and fill the required details like email, password and name etc.
- 2
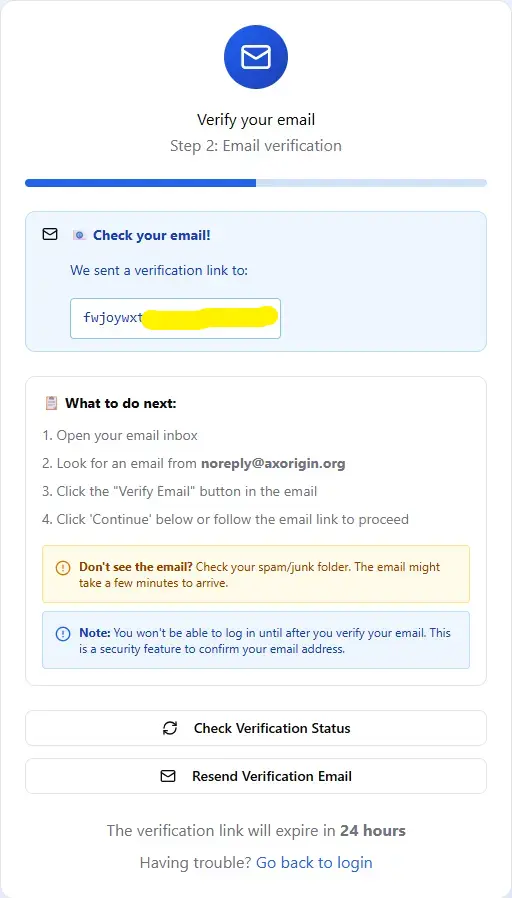
Verify your email address by clicking on the link sent to your registered email.
- 3
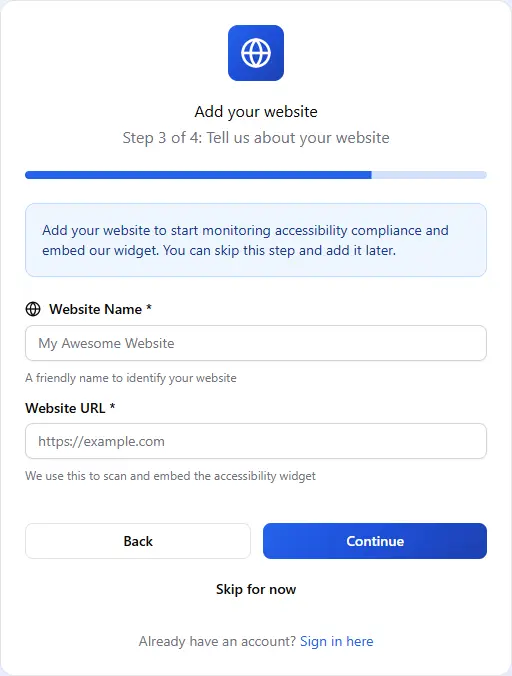
Add your website details in the dashboard to generate your unique code snippet.
- 4
Choose pricing plan suited for your website and start your 14 days free trial.
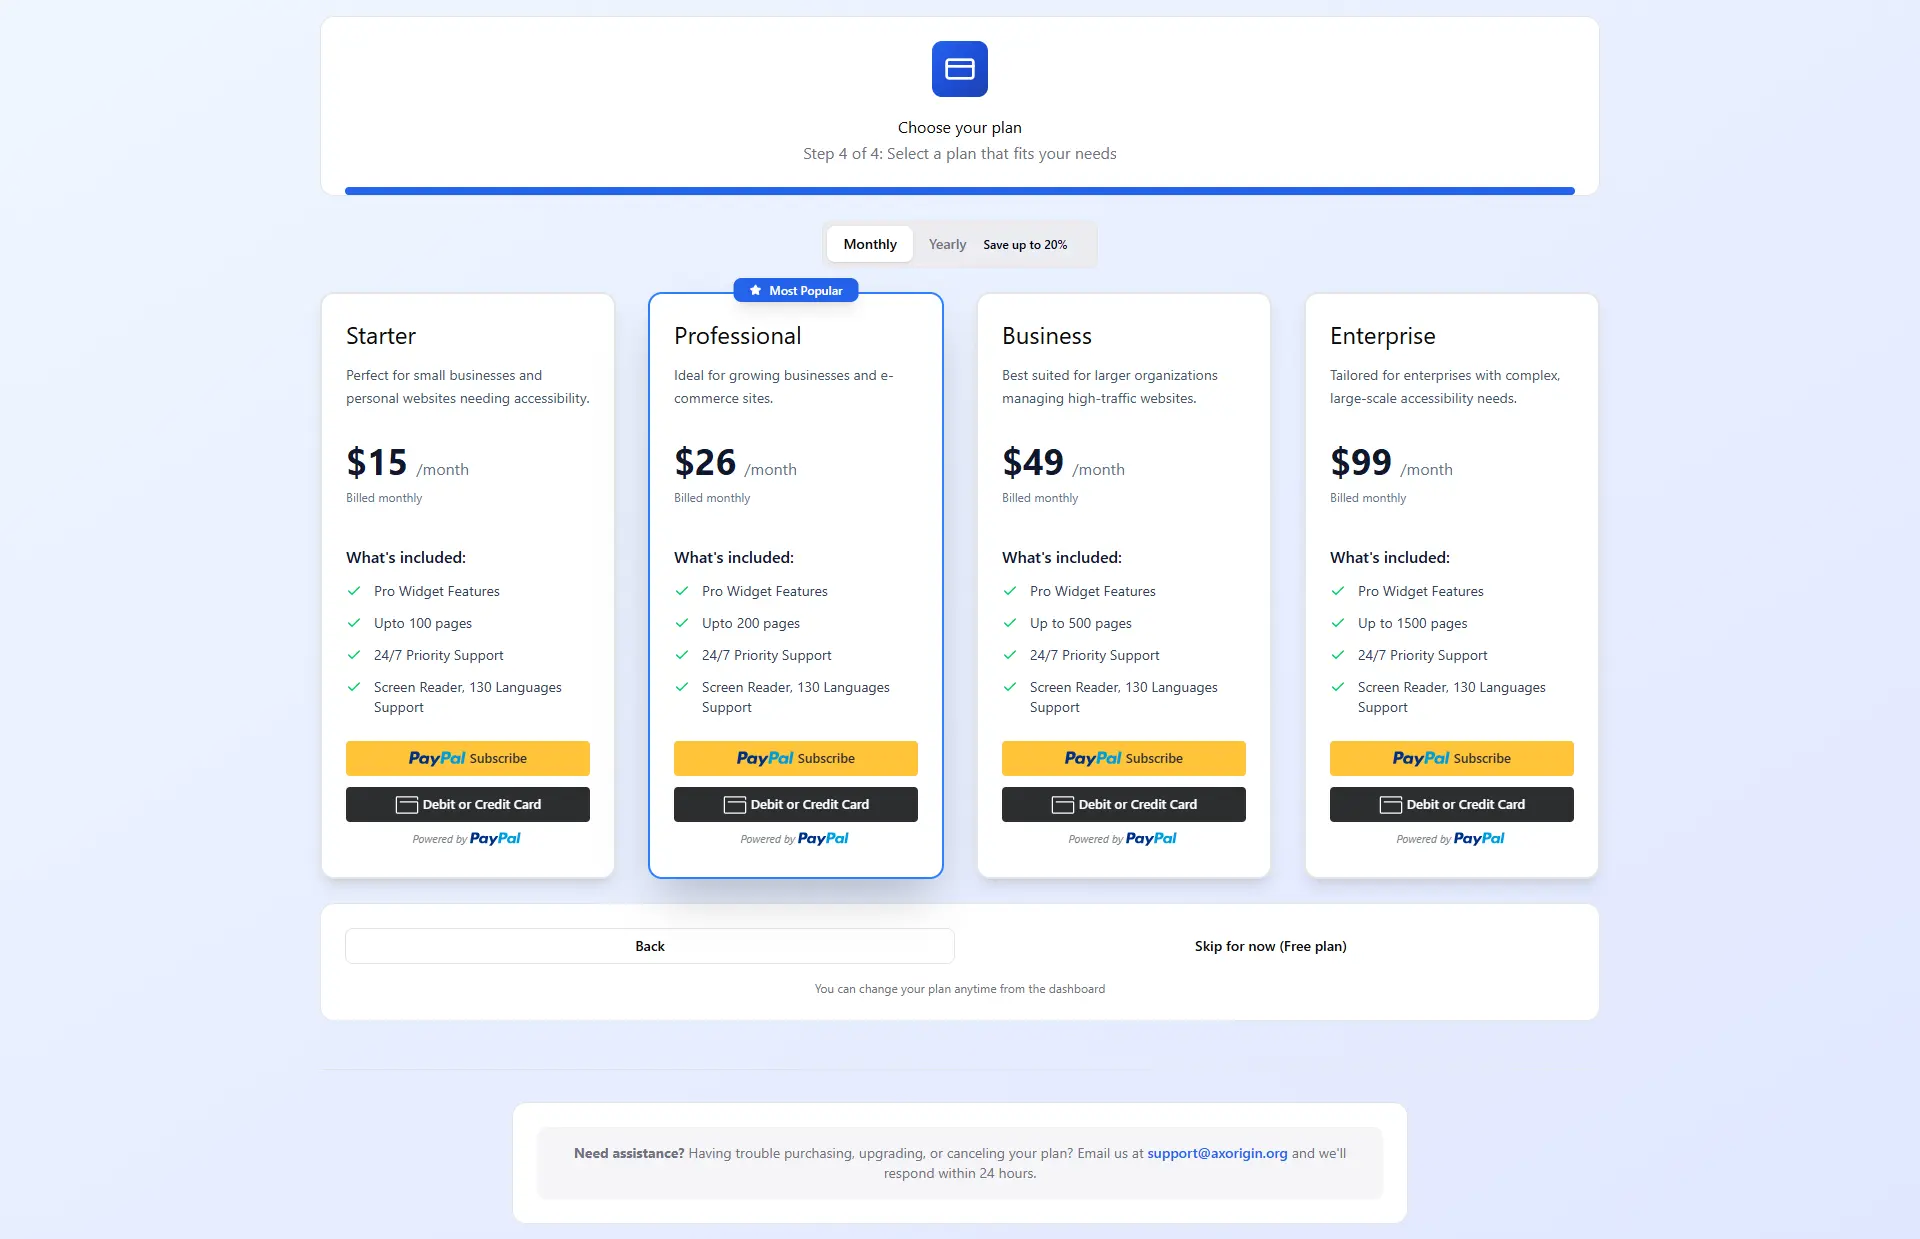
- 5
Select your website from the list.
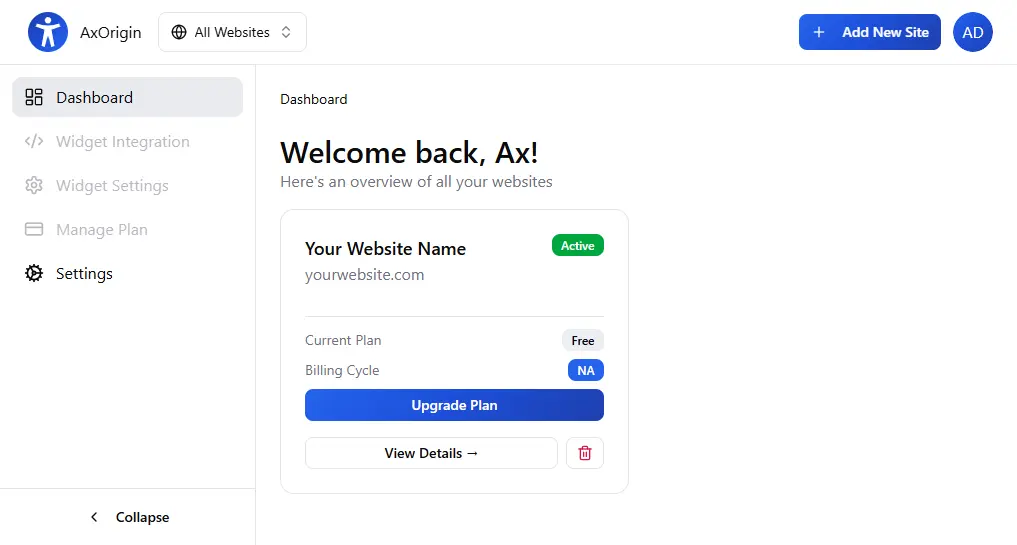
- 6
Go to 'Widget Integrations' tab, and copy the generated code snippet for your website.
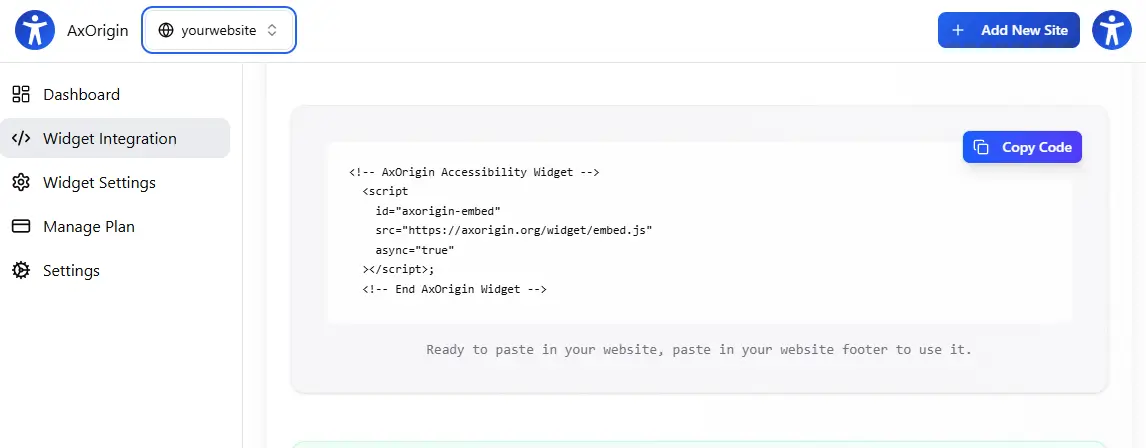
- 7
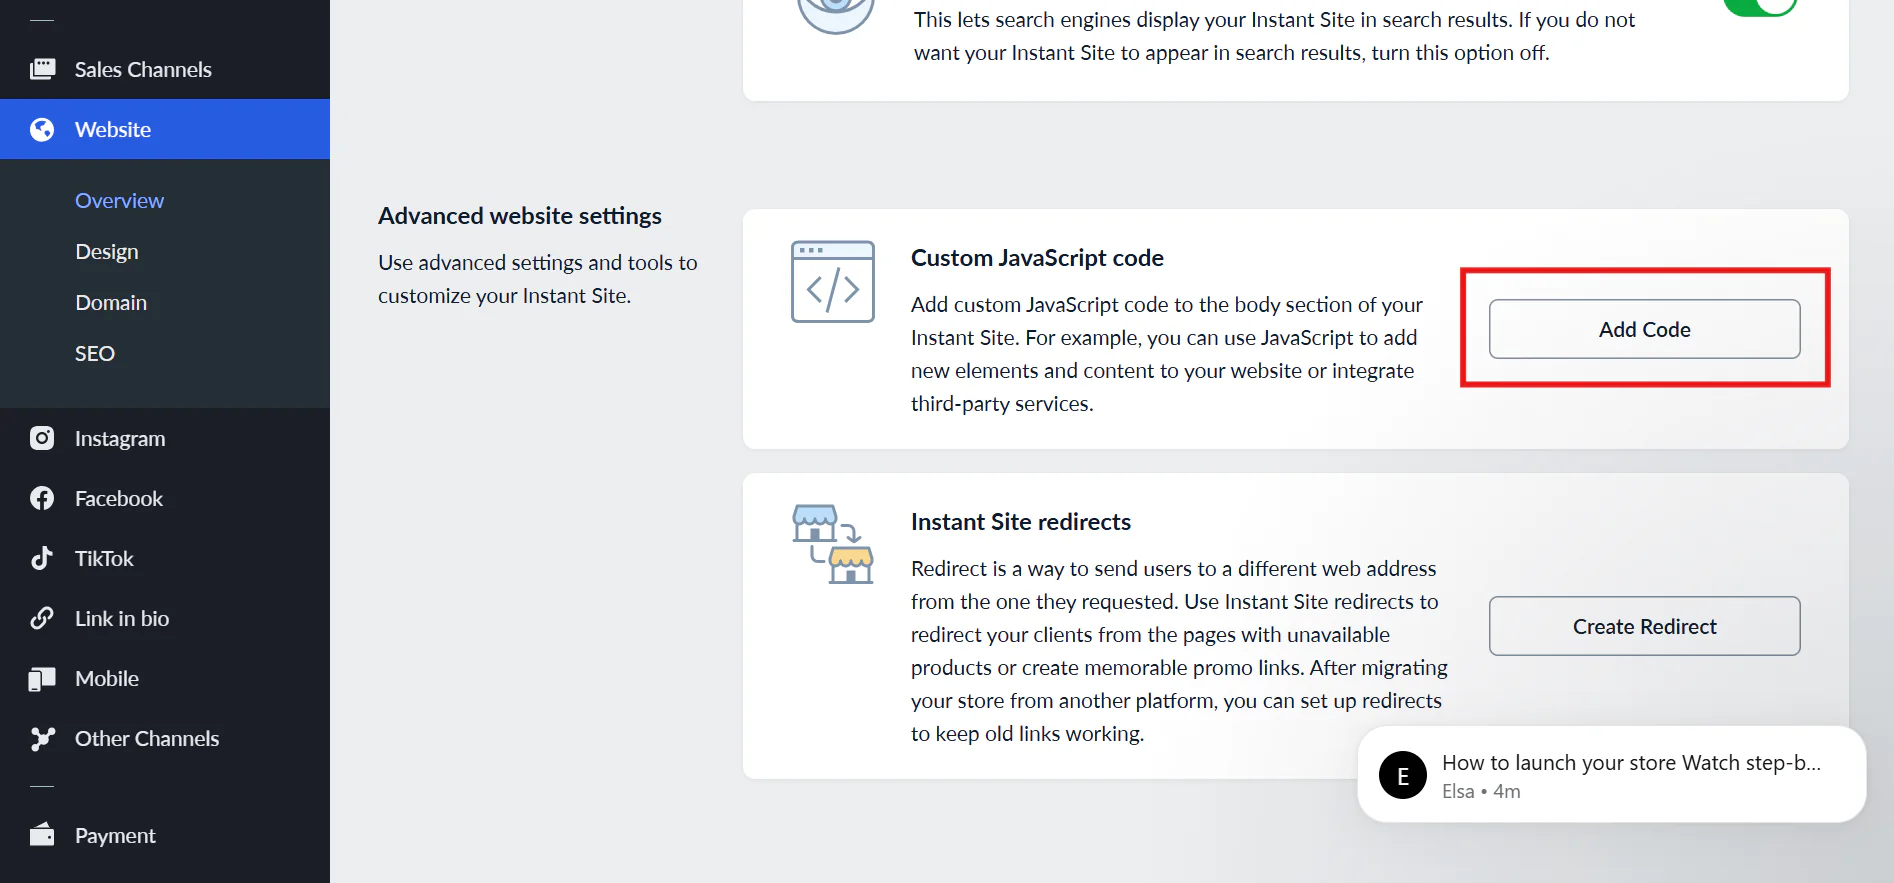
Open your ecwid dashboard and go to Website → Overview.
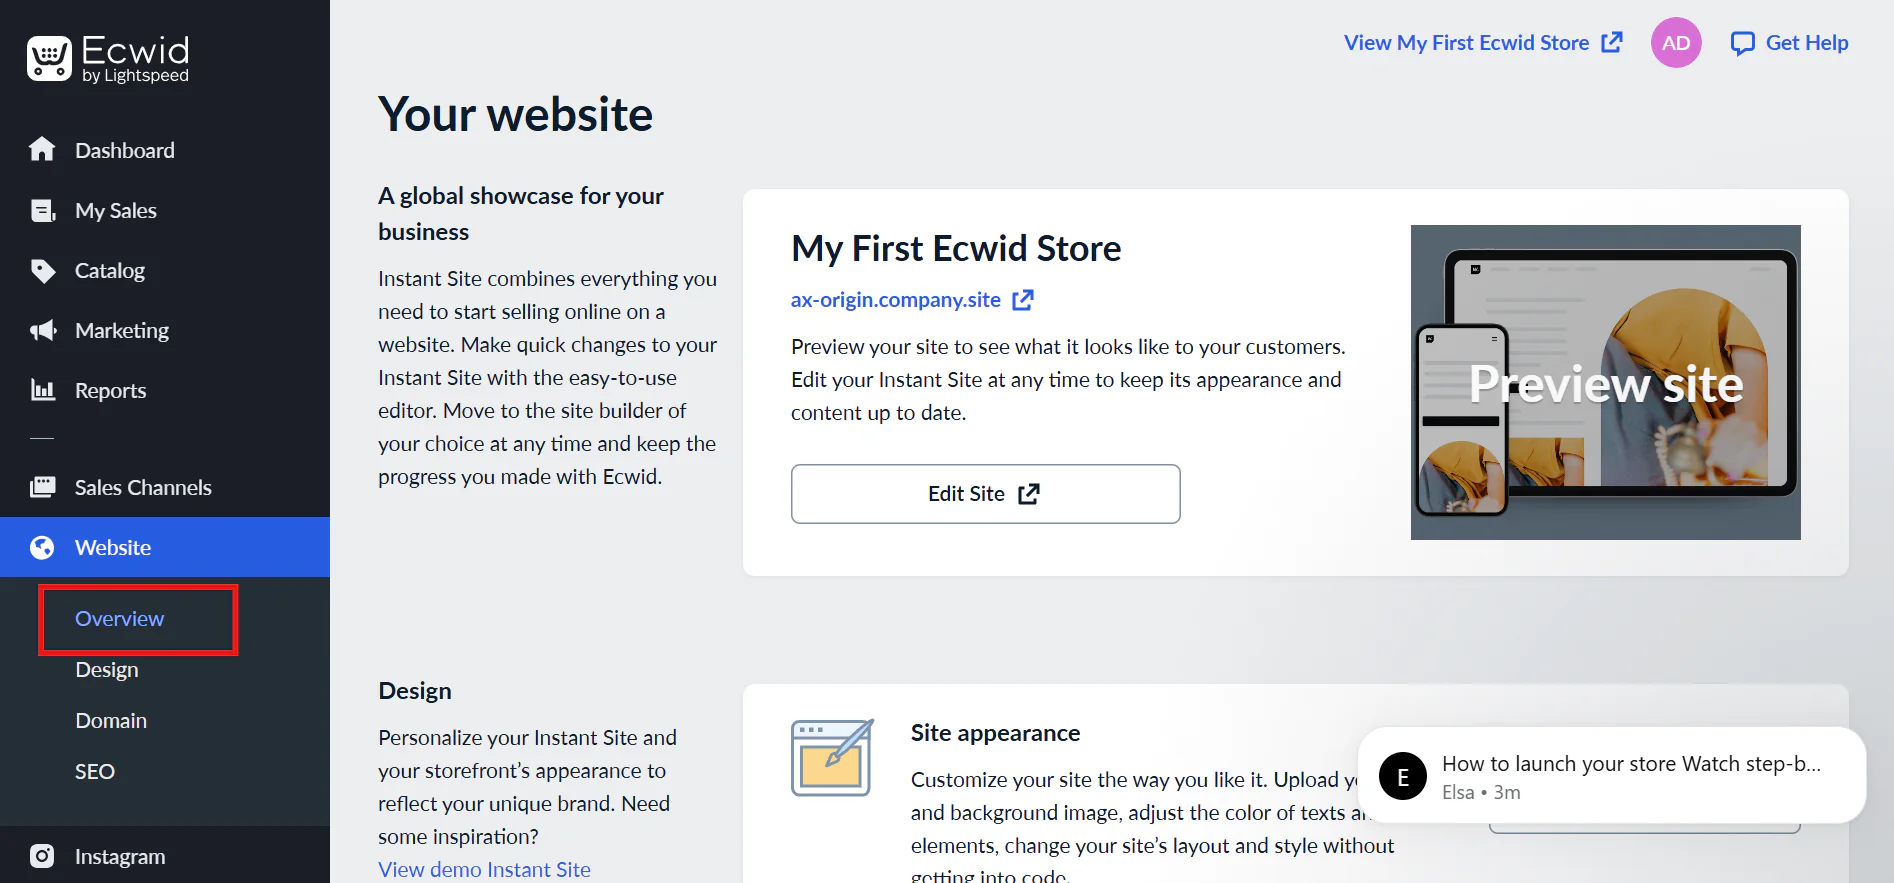
- 8
Scroll down to the 'Advanced website settings' section, and click 'Add Code' under Custom JavaScript code
- 9
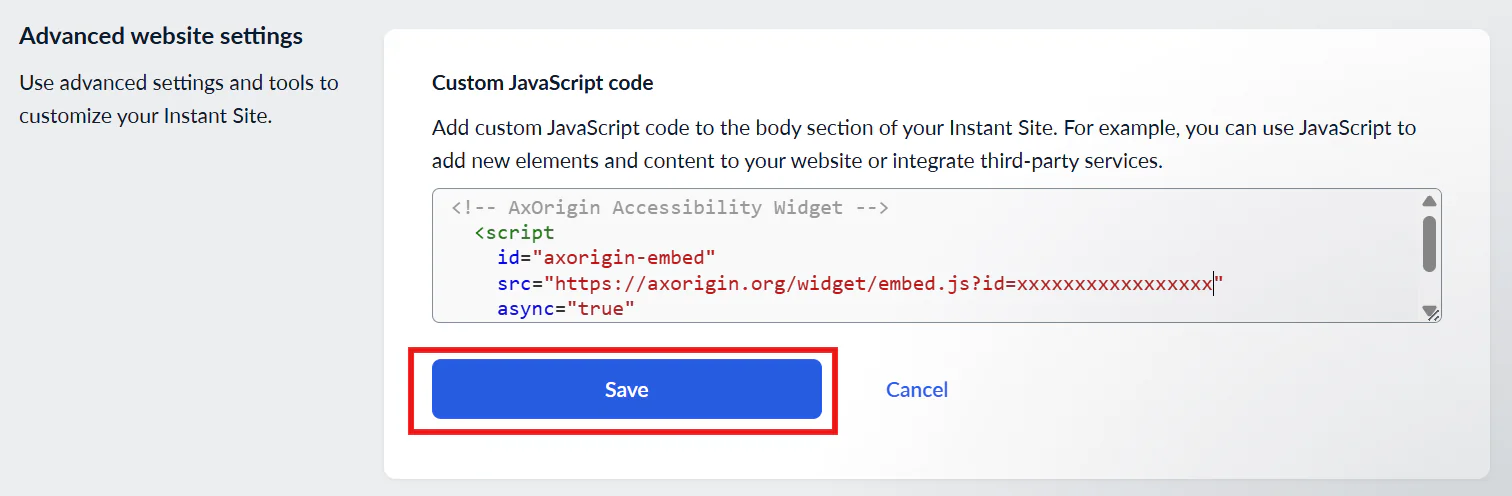
Paste the code snippet in the field, and click on 'Save'.
Ready to Make Your Website Accessible?
Join 50,000+ websites using AxOrigin to provide inclusive experiences for all users.